Windows + Cygwin + Vagrant で WebLogic Server を動かす ~ ゲストOSセットアップ編
Window 上に Vagrant のゲストOSを立てて、WebLogic Server の開発環境を作成しようとしています。2回の記事に分けて手順を紹介する予定で、今回はVagrant でゲストOSをセットアップするまでの手順をまとめてみました。
前提
- ホストマシン
- vagrant の box ファイル
- 今回は、terrywang さんが公開している Oracle Linux 7 の Base Vox を利用させていただきます
Cygwin のインストール時の注意
ssh と scp を利用するので、Cygwin のインストール時に、インストールウィザードの [Select Package] で、openssh の Bin を選択しておく必要があります。

ゲストOSのセットアップ手順
1. ゲストOSの起動まで
Cygwin を起動し、以下のコマンドを順次実行します。
$ vagrant box add oraclelinux-7.1-x86_64 http://cloud.terry.im/vagrant/oraclelinux-7-x86_64.box
$ mkdir vagrant
$ cd vagrant
カレントディレクトリに "Vagrantfile" という名前のファイルを作成し、以下の内容を記述します。
    Vagrant.configure(2) do |config|

        # VM settings
        config.vm.define :wls_ol, primary: true do |wls_ol|
            wls_ol.vm.box = "oraclelinux-7.1-x86_64"
            wls_ol.vm.network "forwarded_port", guest: 7001, host: 8001
        end

        # VM provider settings
        config.vm.provider "virtualbox" do |vb|
            vb.name = "wls_ol"
            vb.cpus = "2"
            vb.memory = "2048"
        end

    end
後々インストールする WebLogic サーバーの管理画面は、ゲストOSの7001番ポートで動作しますので、ポートフォワーディングの設定で 8001 -> 7001 となるようにしています。
続いて先ほどまで操作していた Cygwin ターミナルで、以下のコマンドを実行します。
$ vagrant up wls_ol
コンソールに以下のようなメッセージが表示され、仮想マシンが起動します。
Bringing machine 'wls_ol' up with 'virtualbox' provider...
==> wls_ol: Importing base box 'oraclelinux-7.1-x86_64'...
==> wls_ol: Matching MAC address for NAT networking...
==> wls_ol: Setting the name of the VM: wls_ol
==> wls_ol: Clearing any previously set network interfaces...
==> wls_ol: Preparing network interfaces based on configuration...
    wls_ol: Adapter 1: nat
==> wls_ol: Forwarding ports...
    wls_ol: 7001 => 8001 (adapter 1)
    wls_ol: 22 => 2222 (adapter 1)
==> wls_ol: Running 'pre-boot' VM customizations...
==> wls_ol: Booting VM...
==> wls_ol: Waiting for machine to boot. This may take a few minutes...
    wls_ol: SSH address: 127.0.0.1:2222
    wls_ol: SSH username: vagrant
    wls_ol: SSH auth method: private key
    wls_ol: Warning: Connection timeout. Retrying...
    wls_ol:
    wls_ol: Vagrant insecure key detected. Vagrant will automatically replace
    wls_ol: this with a newly generated keypair for better security.
    wls_ol:
    wls_ol: Inserting generated public key within guest...
    wls_ol: Removing insecure key from the guest if it's present...
    wls_ol: Key inserted! Disconnecting and reconnecting using new SSH key...
==> wls_ol: Machine booted and ready!
==> wls_ol: Checking for guest additions in VM...
    wls_ol: The guest additions on this VM do not match the installed version of
    wls_ol: VirtualBox! In most cases this is fine, but in rare cases it can
    wls_ol: prevent things such as shared folders from working properly. If you see
    wls_ol: shared folder errors, please make sure the guest additions within the
    wls_ol: virtual machine match the version of VirtualBox you have installed on
    wls_ol: your host and reload your VM.
    wls_ol:
    wls_ol: Guest Additions Version: 4.3.24
    wls_ol: VirtualBox Version: 5.0
==> wls_ol: Mounting shared folders...
    wls_ol: /vagrant => C:/cygwin64/home/user/vagrant
ここで、ssh でゲストOSに接続してみます。vagrant で ssh 接続するには、以下のコマンドを実行します。
$ vagrant ssh wls_ol
vagrant up で仮想マシンを起動した時点で、ssh 接続の構成が行われていますので、上記のコマンドだけで接続が可能です。
2. SSH 接続の設定
今後の作業では、Vagrant のコマンドを使わずに ssh 接続できた方が便利ですので、通常の ssh 接続をするための手順を行います。 exit で現在の ssh 接続から抜けてから、以下のコマンドを実行します。
$ vagrant ssh-config >> ~/.ssh/config
$ vi ~/.ssh/config
~/.ssh/config に、仮想マシン wls_ol に接続するための設定情報が出力されていると思います。これだけで、通常の ssh 接続で "vagrant" ユーザーで仮想マシンにつなぐことができます。
$ ssh wls_ol
例えば "root" ユーザーなどで接続したい場合は、"vagrant" ユーザーの設定を同ファイルの末尾にコピーして、必要な部分を "root" ユーザー用に変更します。 以下、記述例です。
Host wls_ol
    HostName 127.0.0.1
    User vagrant
    Port 2222
    UserKnownHostsFile /dev/null
    StrictHostKeyChecking no
    PasswordAuthentication no
    IdentityFile C:/cygwin64/home/user/vagrant/.vagrant/machines/wls_ol/virtualbox/private_key
    IdentitiesOnly yes
    LogLevel FATAL

Host wls_ol-root
    HostName 127.0.0.1
    User root
    Port 2222
    UserKnownHostsFile /dev/null
    StrictHostKeyChecking no
    PasswordAuthentication yes
    IdentityFile C:/cygwin64/home/user/vagrant/.vagrant/machines/wls_ol/virtualbox/private_key
    IdentitiesOnly yes
    LogLevel FATAL
変更を保存して、以下のコマンドを実行すると、"root" ユーザーで仮想マシンに接続する事ができます。"root" ユーザーのパスワードは "vagrant" なので、パスワードの入力を求められたら、それを入力してください。
$ ssh wls_ol-root
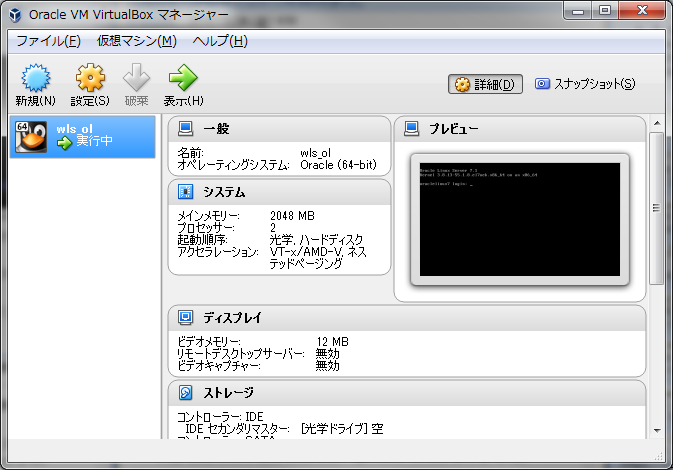
参考までに、セットアップ後のスクリーンショットを。
まずは、Cygwin の画面

続いて、VirtualBoxの管理画面

ゲストOSのセットアップは以上です。次回の記事では、ゲストOSに java と WebLogic サーバーのインストールを行っていきます。